

If you got interested in purchasing your first kefir, here’s a list of what you need:
 kefir grains: they are difficult to find in a shop and usually quite expensive, so if you don’t have a friend that grows them, your best option is to find a fb page, usually people there give them away for free
- milk: cow, sheep or goat according to your taste (the fatter the better). Try and see what you like best, only make sure that you use long-life milk, otherwise your kefir could rot
- jar: or a glass. Depending on how many grains you have, you will need a bigger or smaller jar
- sieve: both plastic and steel are fine
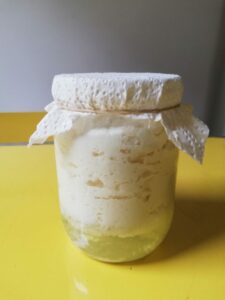
- kitchen paper/napkin: to cover your jar. I also use a rubber band to hold it still. Just never close it completely, otherwise your jar will explode once you open it
- spoon: to stir and filter
And here’s how it works:
 amount: unfortunately I don’t use a scaler to calculate the amount of milk I need for the amount of grains I have. Instead, I fill my jar with grains up to a little more than ⅓ and then with milk
- storage: after I covered the top of my jar with kitchen paper, I store it in my kitchen closet (a dark place will do)
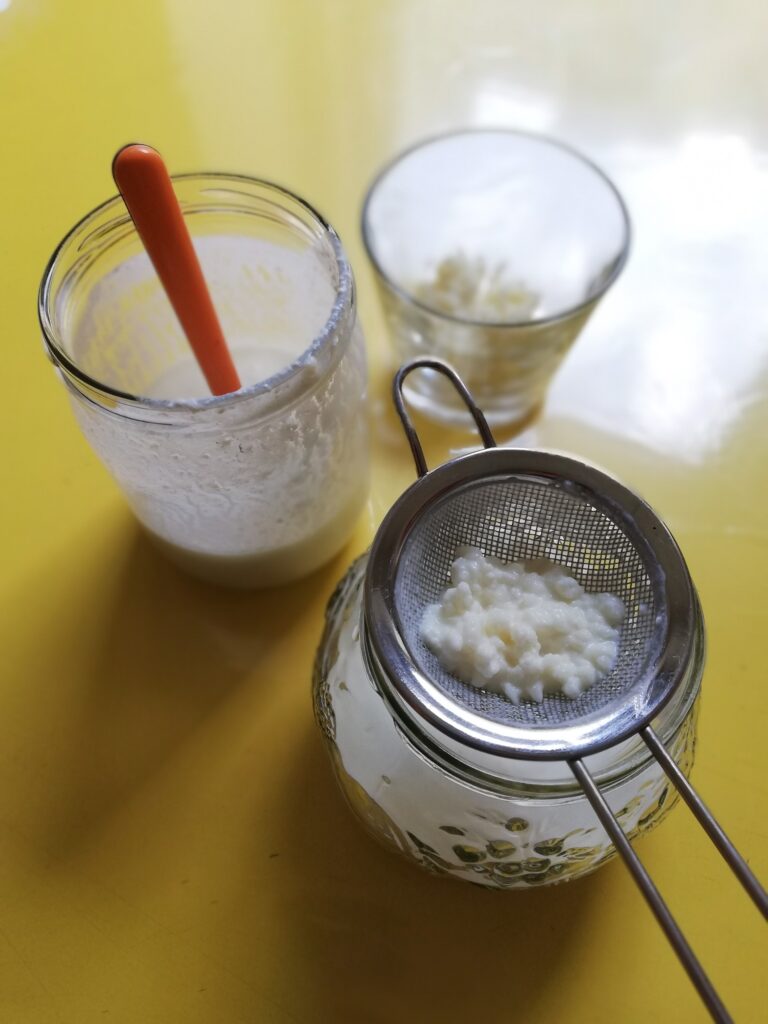
- fermentation: usually, the kefir is ready in 1-2 days. According to the season and room temperature, your kefir will ferment faster or slower. If the room temperature is around 20 degrees, then 1,5-2 days should be enough but during the summer, where the temperature could rise to 25 or more, 1 day could be more than enough. Also, if your grains are very healthy, they tend to need less time to be ready (some people like to put their kefir in the fridge, that way the fermentation will take much longer). It has to be noted that these are only suggestions. Kefir grains are so susceptible that it is difficult to estimate the exact time of fermentation. Also, according to your own taste, you can decide whether you want your kefir to taste stronger or not. So, to be sure, check your kefir during the fermentation, does it still smell like milk? Is it still very liquid? If so, it’s not ready yet. Does a yellowish transparent liquid appear at the bottom of the jar and the smell is kind of acidic, almost pungent? Then it’s ready!
- filtration: now that your kefir is ready, help yourself with a spoon and filter it to separate the grains for the fermented yogurt. You can now store it in the fridge, it should last for 3 to 5 days.
Things to consider:
- during the fermentation make sure to stir your kefir from time to time. The grains tend to stick together on top and if you don’t stir they won’t absorb the milk properly
- sometimes mould may appear on the top. If it’s white, don’t worry too much, it probably means that the temperature in your room is very high or that you didn’t put enough milk in. Just remove the mould, your kefir is still good. If, however, the mould is green, then your grains are probably rotten
- if your kefir smells like cheese or it won’t grow then it’s definitely rotten
When your grains keep growing and your need some rest:
- the grains alone can stay in the fridge for at least 3 to 5 days. If you leave them longer, however, they will probably die
- you can give some of your grains to your friends or put them online!
- you can freeze them if you need a longer break
When you have too much kefir:
- you can use it instead of yogurt in many recipes! Cakes and muffins work the best since the fermented drink will also increase the rising of the dough
- prepare cream cheese! Look online, there are many recipes you can find
Don’t miss my upcoming post on water-kefir!